Wednesday, May 20, 2020

FMP: Week 20 Wednesday

On Wednesday, I went back to the foot IK to try and get it working. In the end, I had to reduce it significantly, and remove the hip offset as it was glitching the player up and down every now and again, especially when jumping. Another reason I had to dampen the effect was that the horse link really didn't like being pushed up too much, which is understandable considering the anatomy.
Leg IK hooked up to the animation
Once again, hooking up to the custom function
Hooking the socket locations into the custom functions, then picking only the leg with the highest difference so that one leg will always be touching the ground. I implemented this after watching both legs go up at the same time once and thinking: 'why would you crouch like that when you can just stand...'
I used sphere trace this time, so that the trace wouldn't accidentally find a gap between collision boxes, and would instead be thick enough to ignore it and hit the surface edges instead.
I compiled once again, (also a few times after that while I was trying to figure out what would give the best results) and tested in scene:
Time to test all of the surfaces!
Smooth alpha lerp between the current leg position and the new one
I found that the IK system liked some collisions, but didn't work for others, and especially didn't like being directly on the edge of a tall collision box:
please make your mind up about being up or down... please...

Tuesday, May 19, 2020

FMP: Week 20 Tuesday

On Tuesday I followed some advice I'd gotten from Heather on rooting the base of the foliage to the ground when using a trim sheet with bases in different places on the UVs. I asked if there was a way to mask the bottom of each mesh without having to vertex paint them each seperately in UE4 and she reminded me that I can simply apply it in 3ds max beforehand. I followed this method and used the vertex colours as a mask to lerp the wind with the static position at the bottom of each mesh, and in some cases along the stem if it was thick enough to not be effected by the wind. (eg. the Elephant Leaf plant).

Example of the vertex painted foliage
Lerping the wind
Final grass effect

Monday, May 18, 2020

FMP: Week 20 Monday

On Monday, I decided to follow with the crit that Kat and Craig had given me, and made some more assets for the scene. I started by making a substance designer net where I loosely followed this burlap texture tutorial:

Creating the rope texture
Creating the height
Creating the mask where they weave in and out of eachother, with an empty blend node at the end to have something I can hook up to all the outputs without having to reconnect them each time I add a new node.
Outputs!
Final texture
After this, I modelled the net by simply using a melt modifier on a spherified cube, then adding a donut shape for the rope typing it closed, and a funnel shape that was just a plane with the middle point dragged down, then some extra topology was cut in to deform it at the top:

I had to split the bottom from the rest of the mesh as the UVs would distort weirdly otherwise, but I planned on hiding the seam with copious amounts of fish :)
While I was in max, I also quickly blocked out some planks of wood to form a campfire, using the trim sheets from earlier to texture it:

Finally, I brought them into the UE4 scene and started set dressing:
Seam successfully hidden :D
I quickly made a material for some fire following this tutorial and plugged it into a particle effect using a duplicated emitter for rising smoke, and some circular emissive embers rising up:

panning noise to distort a circle mask into a flickering flame shape, then adding another colour into the center in the same shape to create the inner flame colour.
Particle effect!
Finally, I added the logs to the scene, placed a cobblestone decal underneath it and placed the fire emitter inside. For added storytelling I stabbed some blowpipe spears into the ground with fish on the spearheads to suggest that the tribe are slowly cooking their dinner for later... delicious!

I guess the appeal of slow roasted fish for dinner is too good to pass up...
the guard wants you to fetch him some fresh sushi instead

Friday, May 15, 2020

FMP: Week 19 Friday

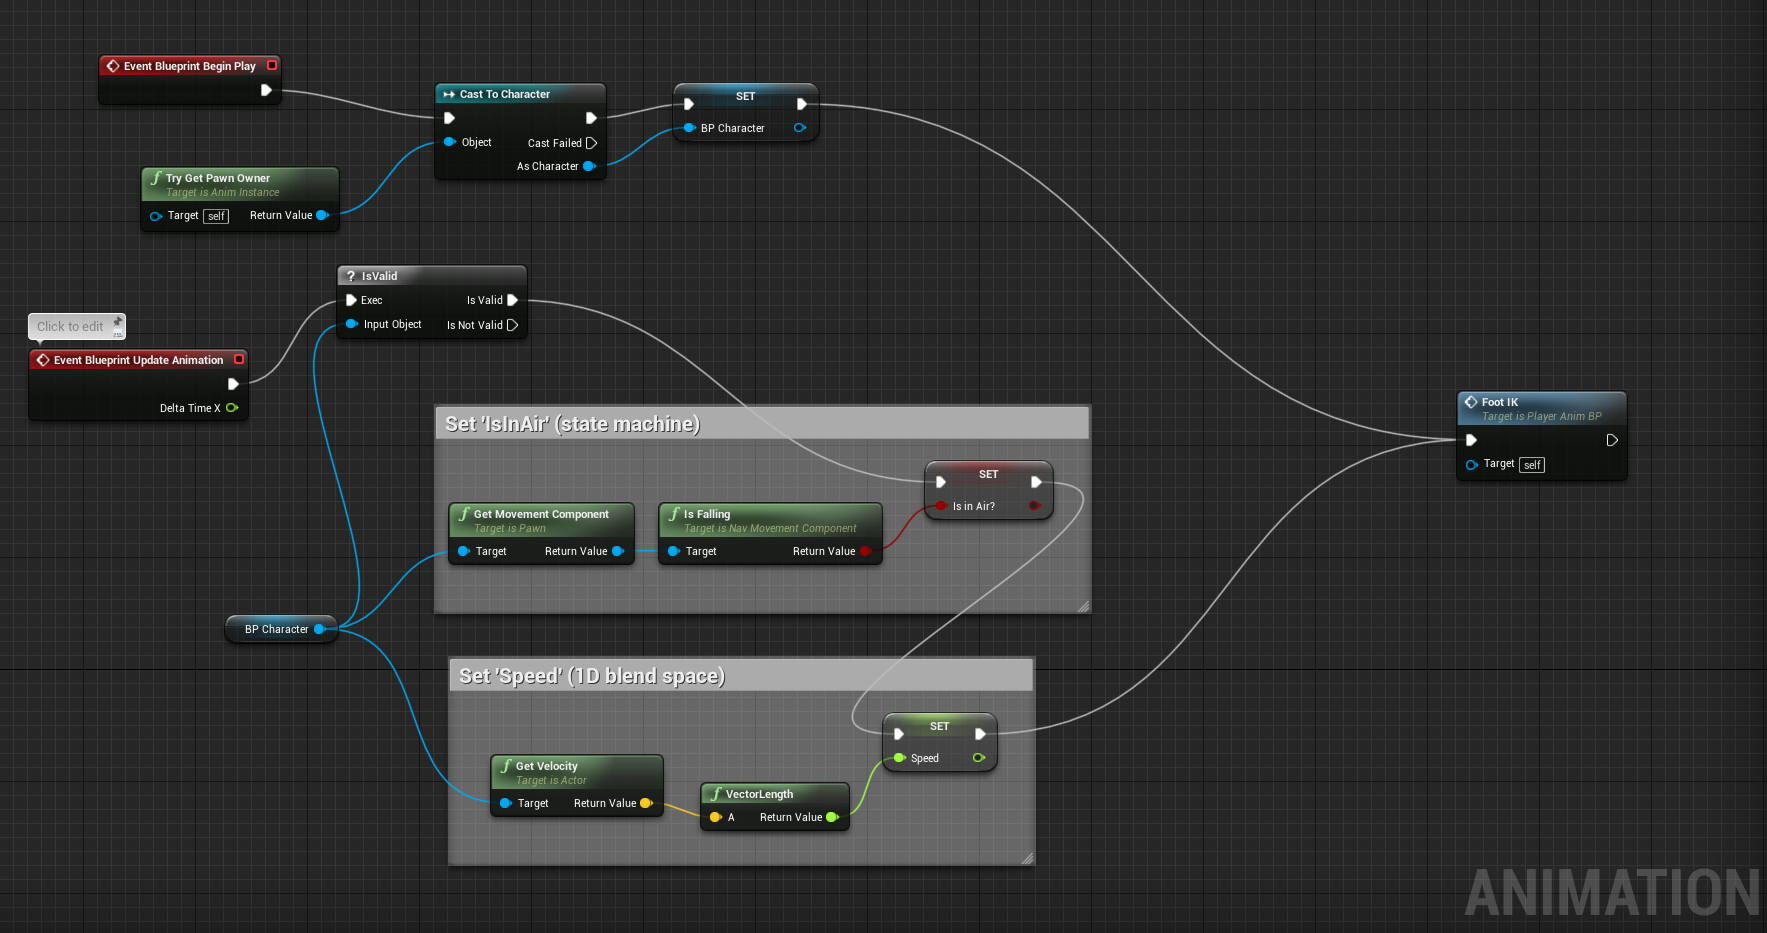
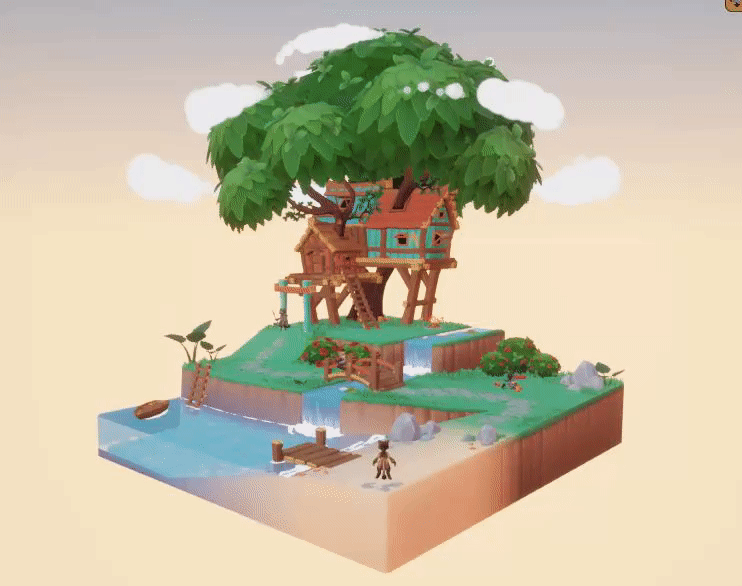
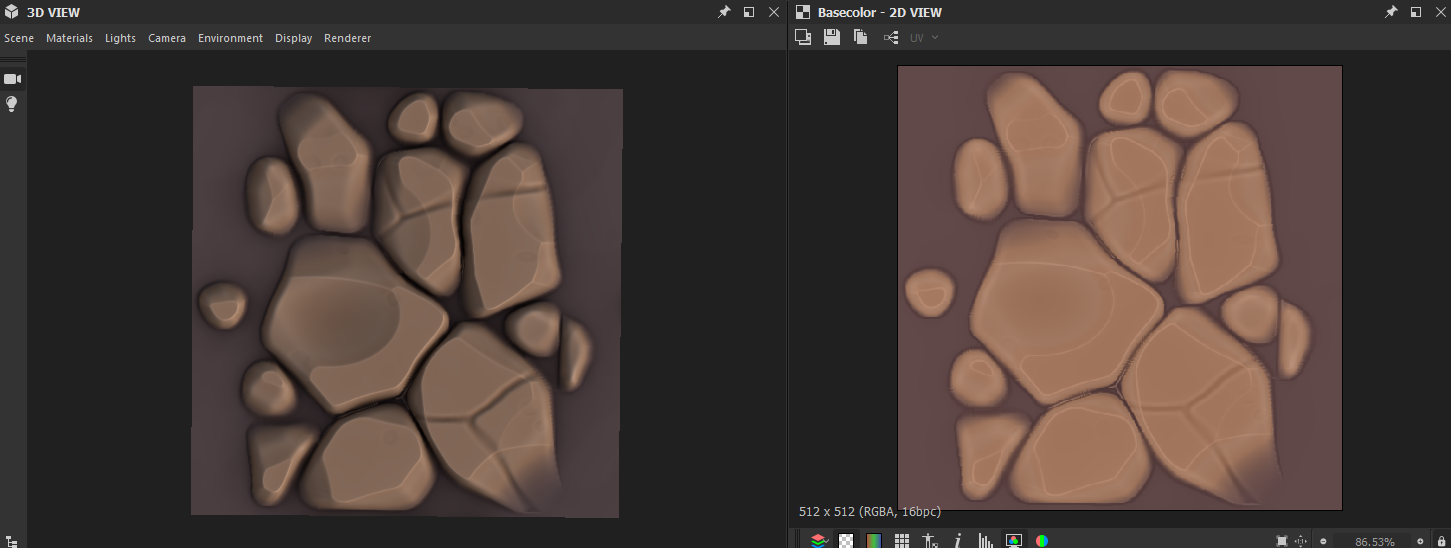
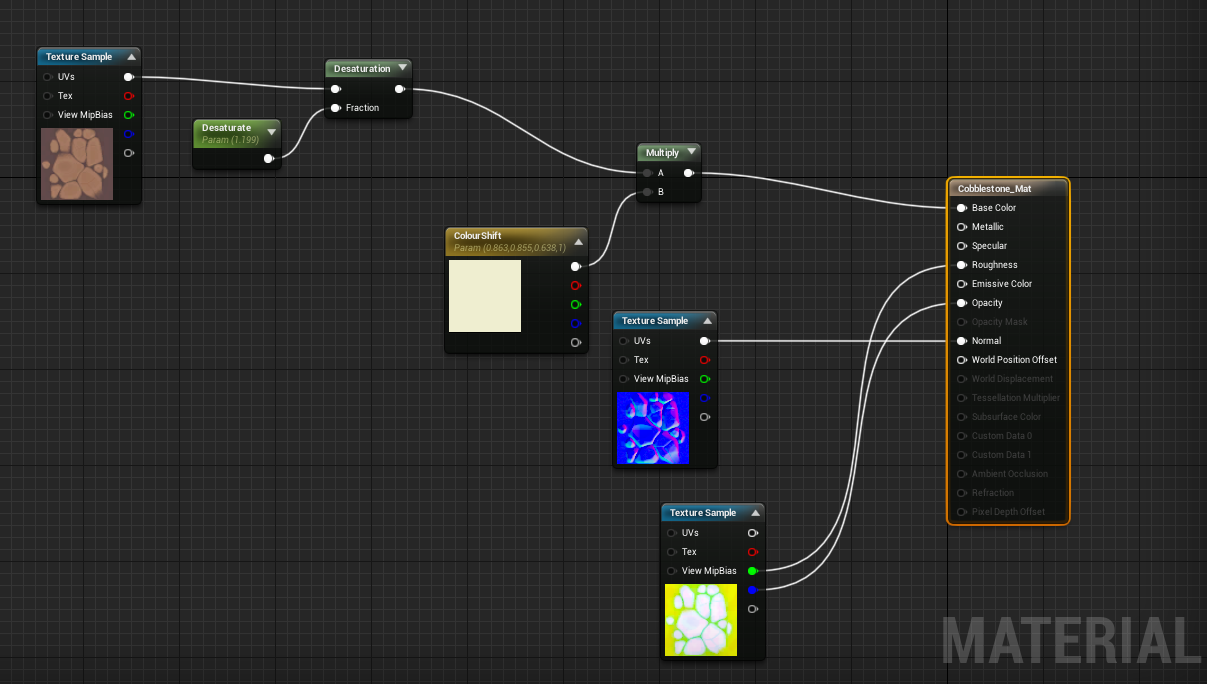
On Friday, I Fixed the bush morpher animation for the hibiscus bushes that weren't working before, and separated the materials so that I could add a new instanced material to make the flowers brighter. I managed to apply it to the same bones and physics the other bush used too to save space. After this was completed, I moved onto adding the short grass to the scene to break up the cobblestone pathway a bit. The topology was very simple and could disappear completely if viewed from the wrong angle, so I decided to add a billboard affect in the material using this tutorial:

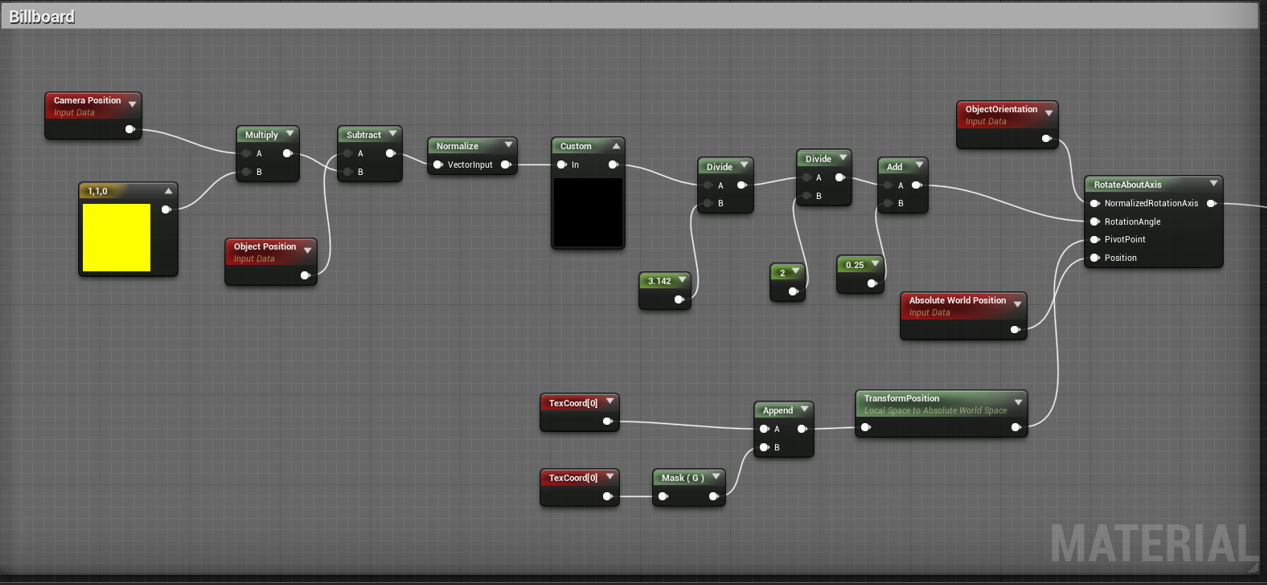
Rotating the mesh to face the camera at all times
I plugged it into a static switch parameter for easy instancing, then placed it around the cobblestone:
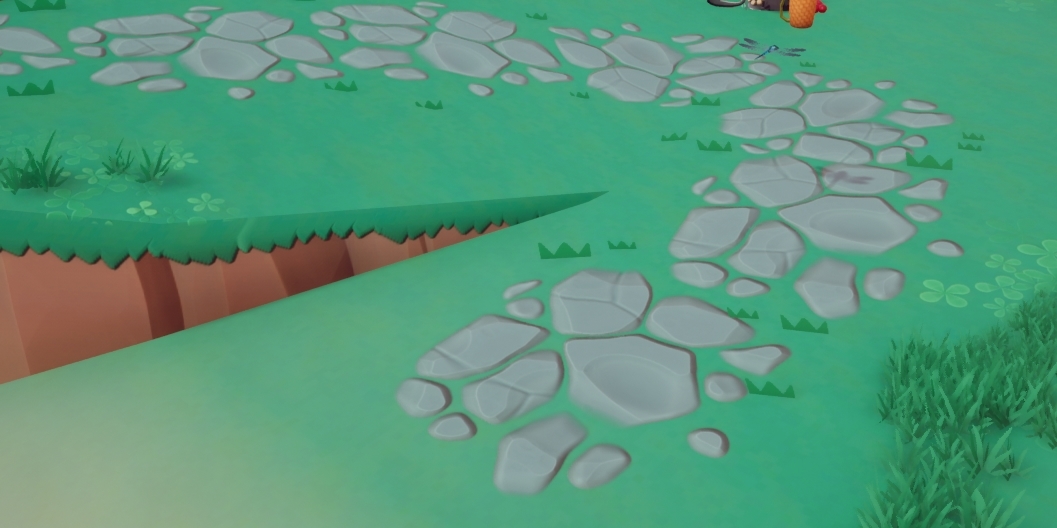
They're always watching you.....
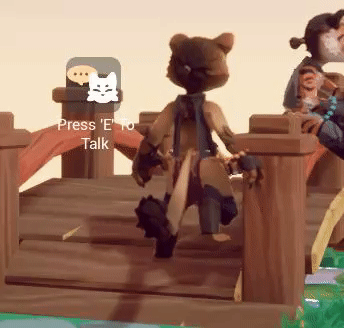
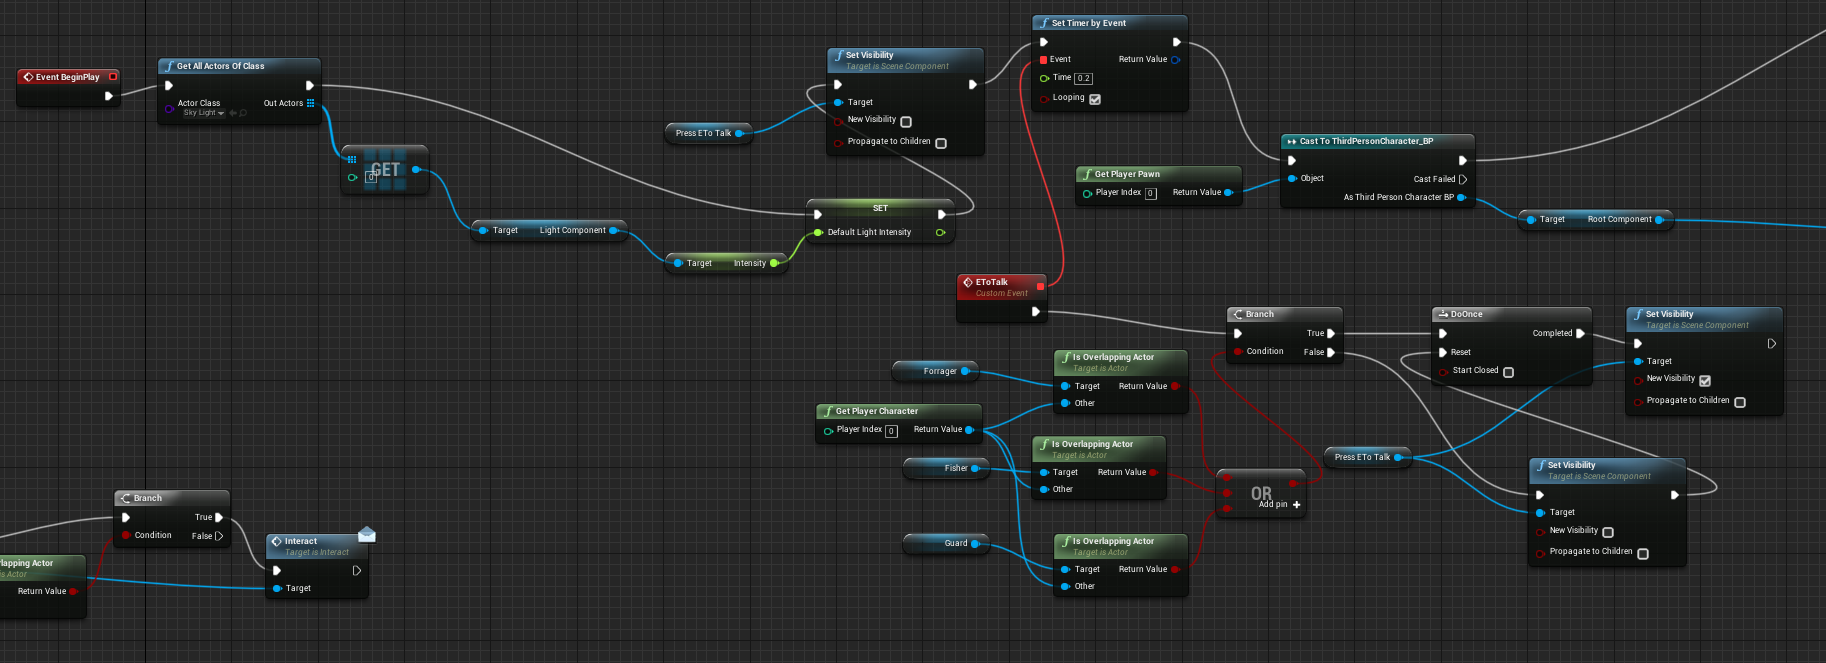
From here I moved onto adding a press 'E' command prompt so that the player would know when and how to talk to the npcs, which I created in photoshop and imported in to use as a widget texture:
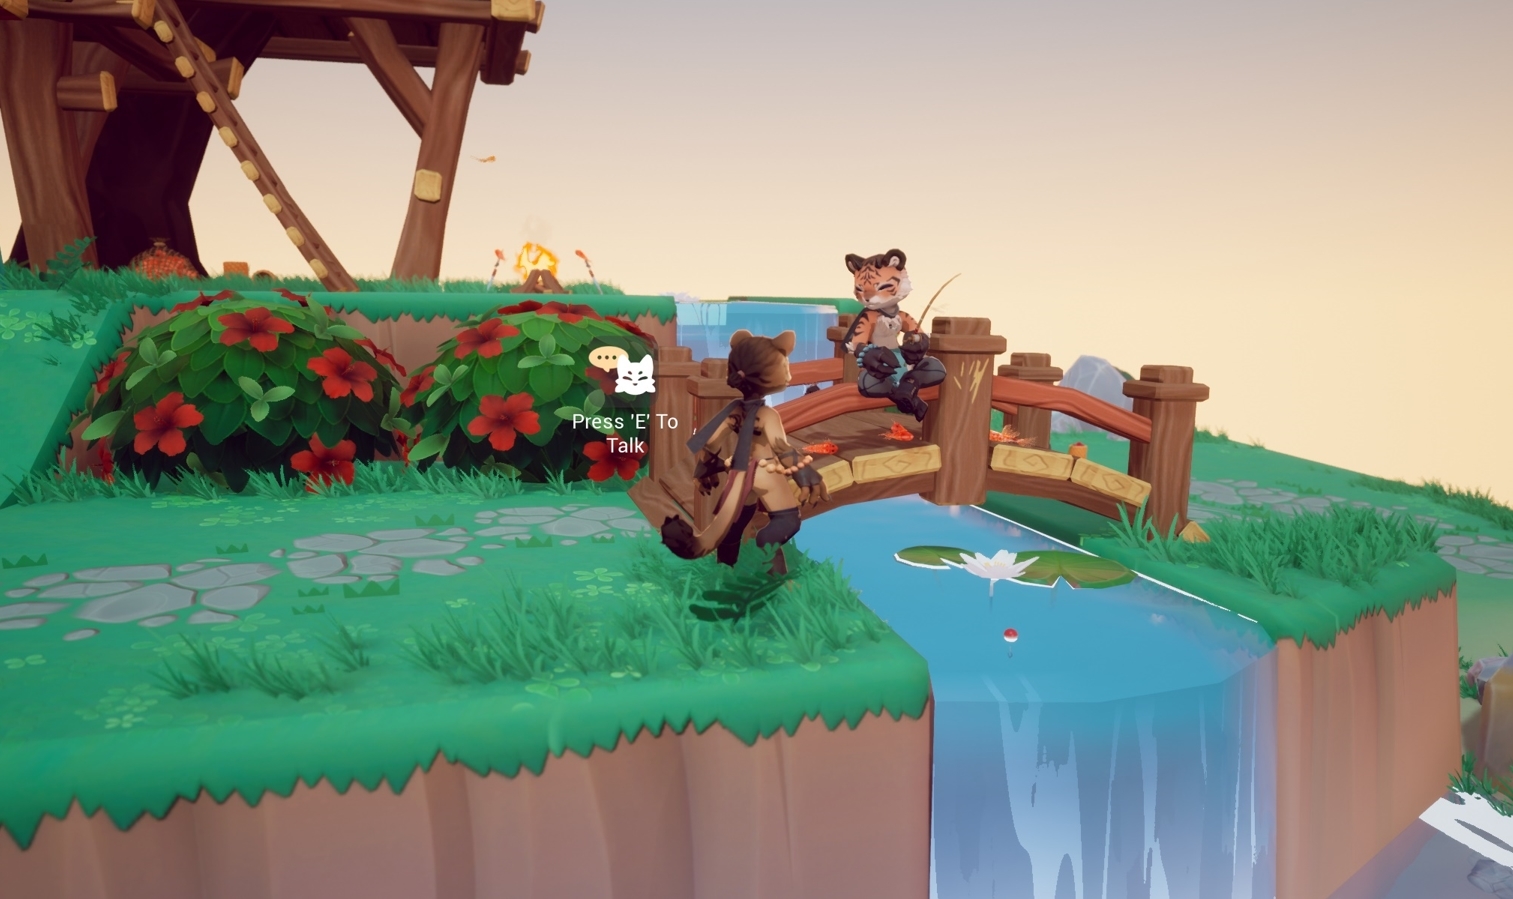
Go talk to him!!
for this, I reused the knowledge I'd learnt from the previous interaction widget and placed it within the character blueprint as a screen space widget, which would always place it on top, but would center it to the player with an offset so that it would be visible to the side. This was inspired slightly by Blade and Soul's interaction widgets seen here:
Widget and blueprintst:
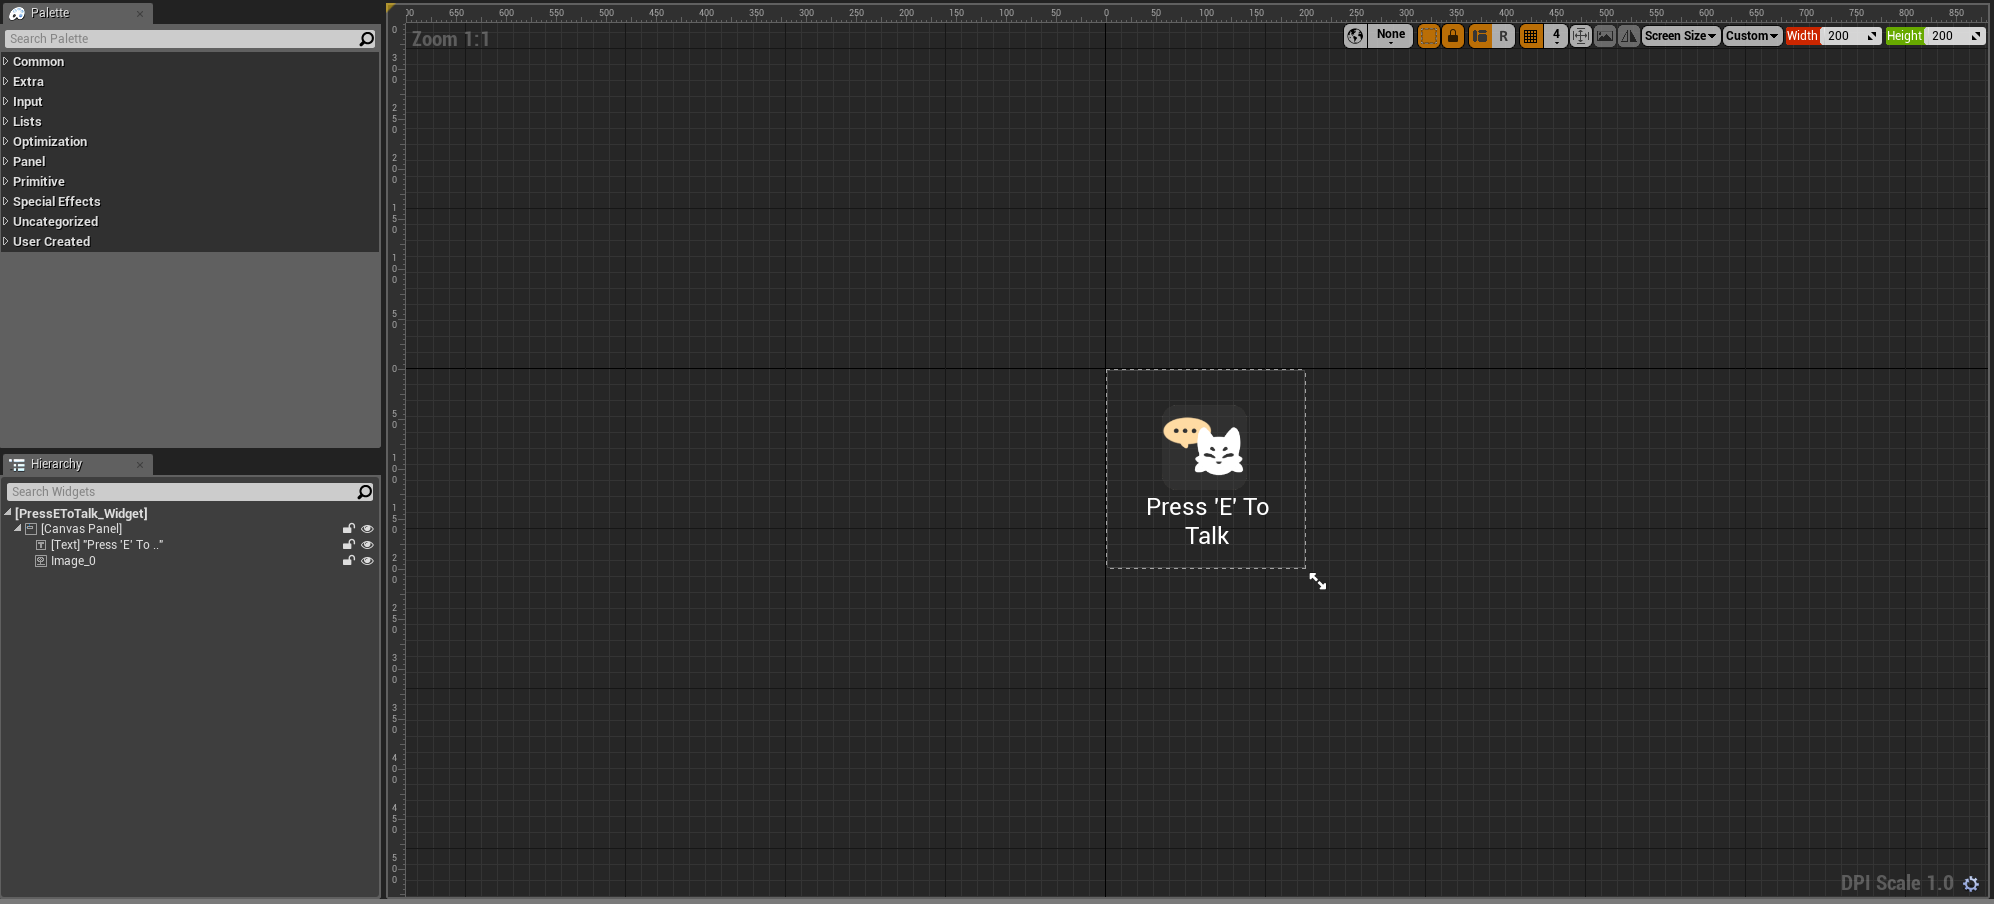
I wanted to keep it bold and simple so I kept to flat colours
Blueprint determining when to show the widget
Blueprint turning off the widget when the conversation is halted
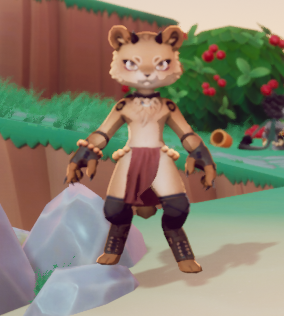
After this was complete, I finally moved onto working on something I found very exciting: tail physics!! Once again, this was inspired by my time playing Blade and Soul previously:
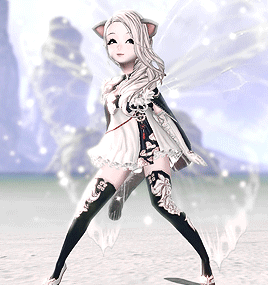
I couldn't find my old gifs so I grabbed one from google (linked image)
I was unsure how to go about this at first, as resources were incredibly limited upon googling. I only really saw ponytail physics which entailed detaching the tail and then attaching it to a socket as a physics enabled mesh (which I feel like blade and soul has probably done) but my tail was rigged and attached, so I had to find another way.
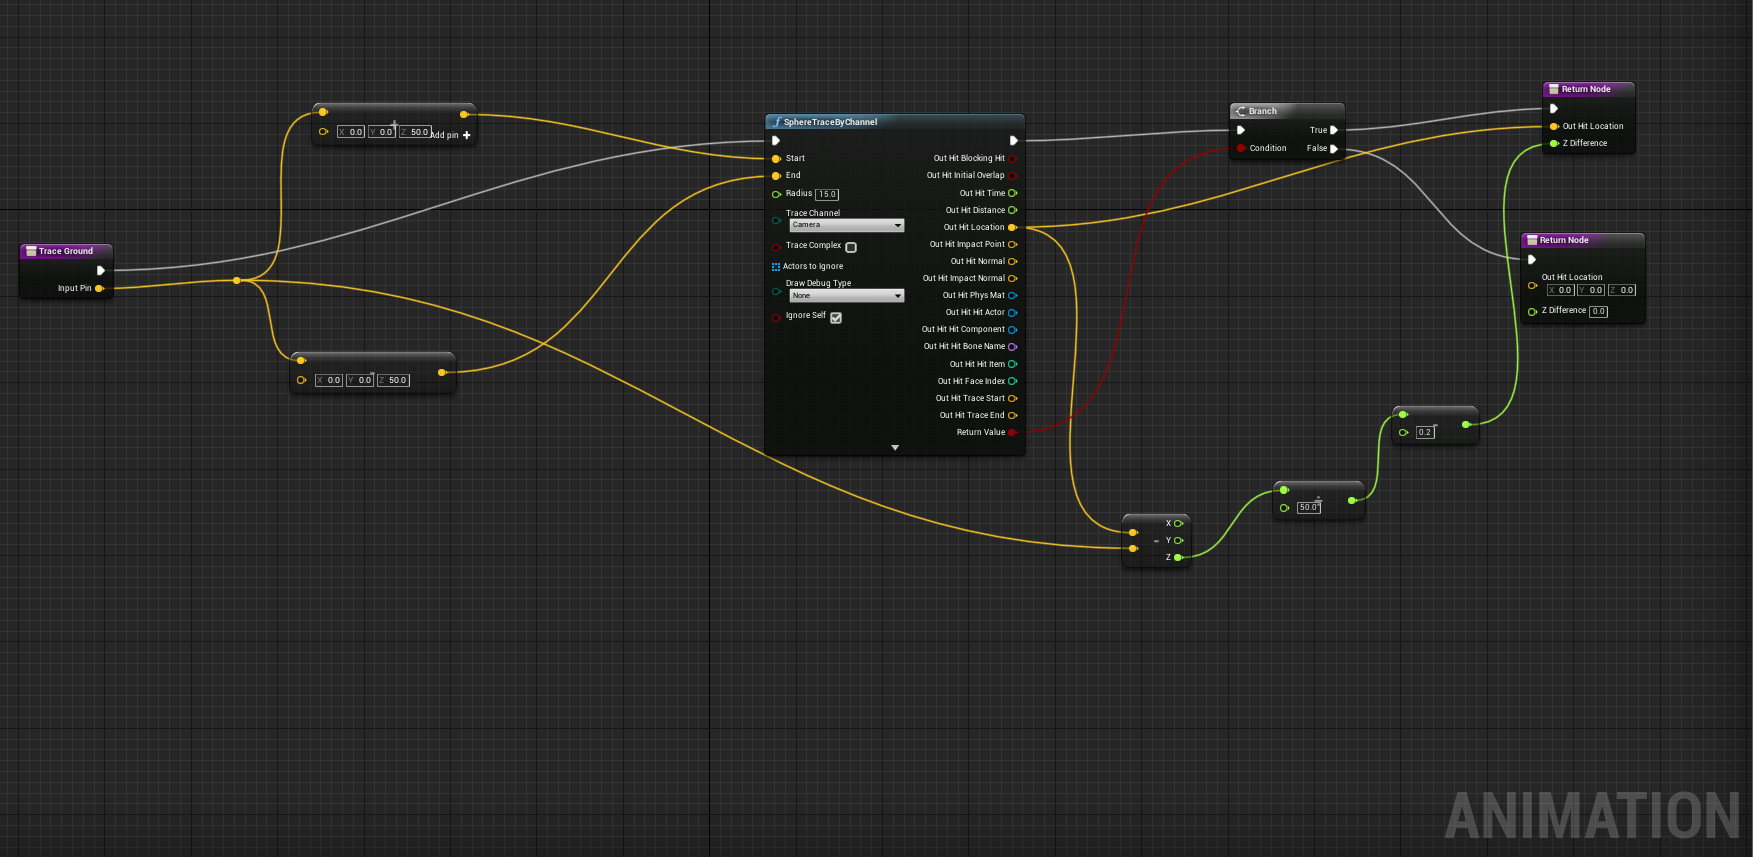
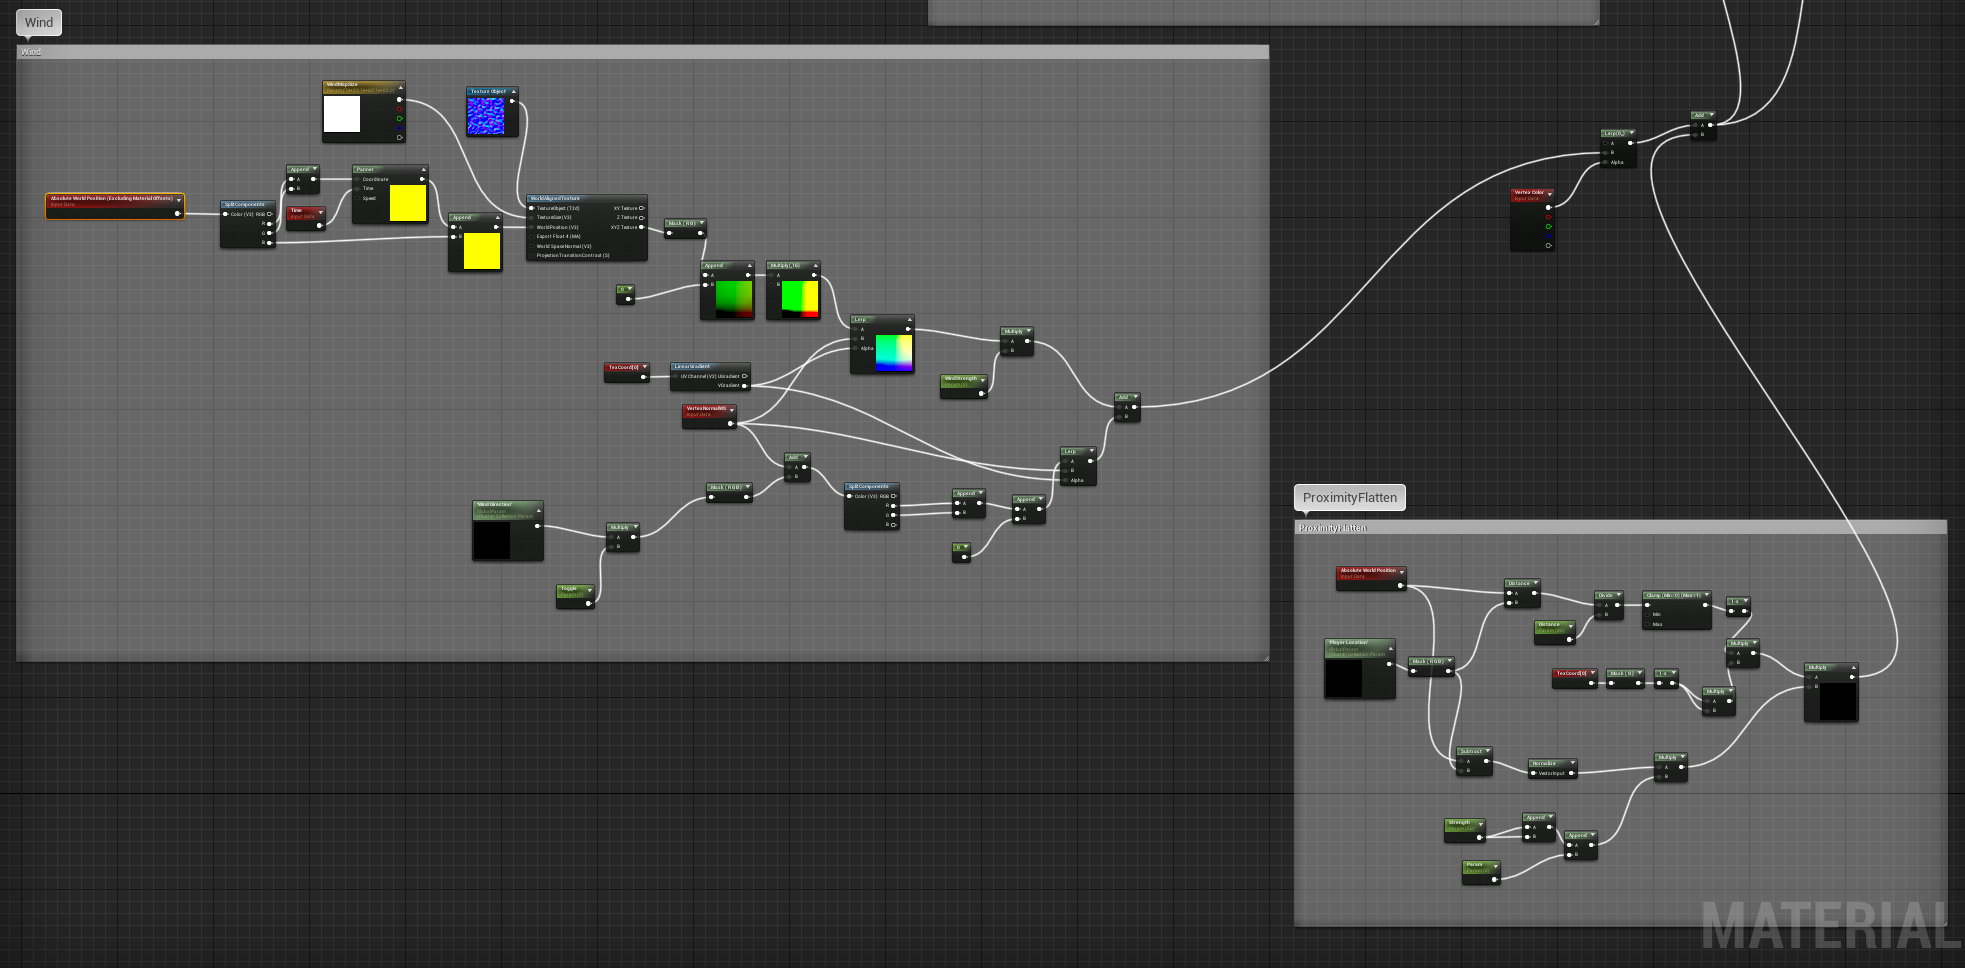
Finally, I found this tutorial for anim dynamics! after a lot of tweaking and watching this UE4 feature highlight to try and understand what each of the settings actually do, I managed to make the tail react to movement, but still keep its form enough that it looks like part of the player's body rather than a limp attachment completely reliant on physics:

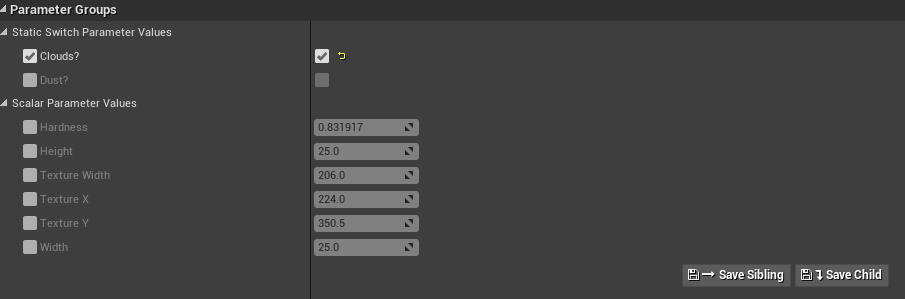
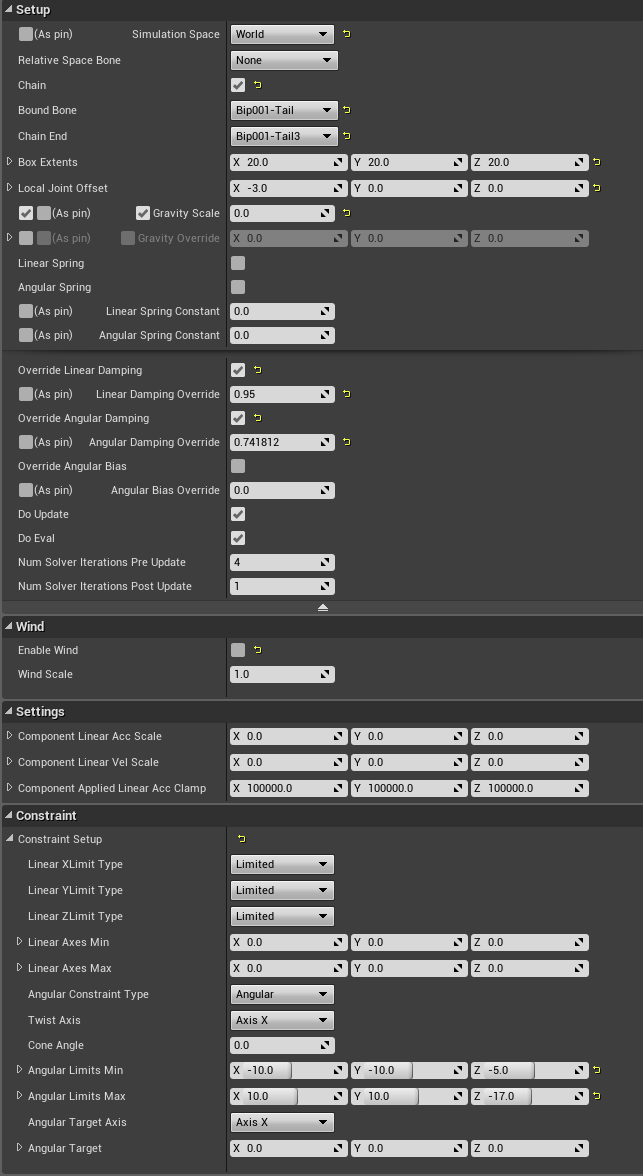
Anim Dynamics Settings
I wanted the physics to be set in world space rather than local, and decided to use only a few of the bones in the chain so that I could keep the curve at the end of the tail. The box extents made the physics a little stiffer, and I sued dampening to further reduce the movement. I disabled wind because I felt that the bones would hold against the breeze, and then edited the angular limits so that the tail wouldn't fall so far down that it would mess with the cloth physics of the loincloth.

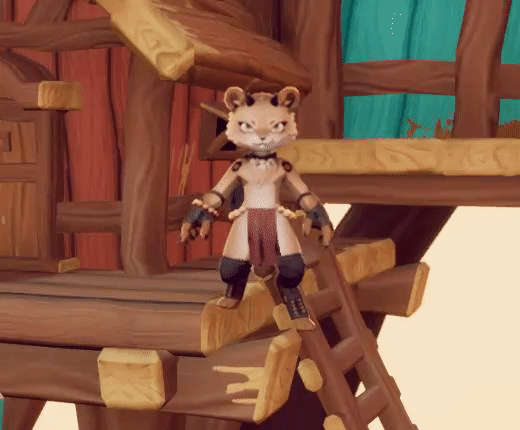
After all of this, the physics were still too reactive for my tastes, but the limits themselves were fine, so I ended up reducing the alpha to 0.3 for easy dampening.
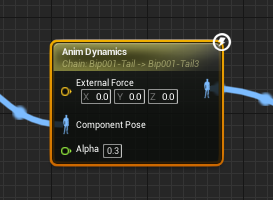
plugged into local to component and component to local nodes to hook between the player state and final animation pose.
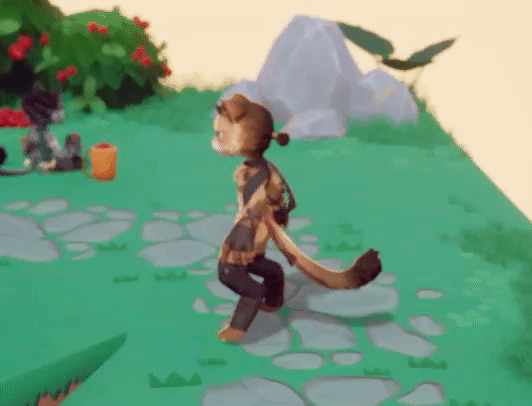
Final physics!

Thursday, May 14, 2020

FMP: Week 19 Thursday


On Thursday I made custom collisions for some of the assets. The ones that I didn't make custom collision for used UE4 capsule collision or a default UE4 simple collision, since there was no reason for me to spend extra time making collisions when there are already effective options.
UCX Name Files
UCX Name Files
Trim Assets
Treehouse
Plinth

Wednesday, May 13, 2020

FMP: Week 19 Wednesday

On Wednesday I made some minor adjustments to the scene where I noticed that I had misplaced some trim sheets, and then went on to create the clouds for the scene.
Only had to check one instance parameter

Cloud particle system
In scene!
I wanted the clouds to trail and break off into sections, so I simply copy, pasted and resized the particle system into evenly spaced areas, checking from different angles to make sure that there reasonable space between them.

Tuesday, May 12, 2020

FMP: Week 19 Tuesday

On Tuesday, I worked on the cobblestone pathway!
I referenced this tutorial as I was making my designer file:


I wanted to have a simple cluster of stylised cobblestone rocks in a mask that would be easy to tile along a spline in the scene using decals, so while I was creating the texture I kept switching between different tiling multipliers to check that it could be placed in a line without looking too repetitive. I fiddled with the settings for a while to remove any bold contrast in the shape language or colours that would be easily spotted as a pattern when tiled.

Final substance designer texture
I made some changes to the material in UE4 to make the colours fit with the rest of the scene, as gray stone that matches with the other rock colours ties the scene together more.
Construction script for a decal spawning spline. Rotation and placement is set along the spline,
which controls the decals.
Settings for the decal spline
Pathways!
The splines were created following a tutorial in the replies of the link that Kat sent me